Let's PLAY
- Apr 16, 2018
- 5 min read
Lamps from White-moss. Swing chairs from Marina Home. Carpet from Crate& Barrel. Cactus from Tribe.Cushions from H&M home. Drawing deck from IKEA.
Let's PLAY
Minty with a pinch of Mustard is the New Pink
Bali in Dubai
Part I
Hello, readers! It's me again, Moni - alias, Tati's partner in crime and interiors obsessed lady. It’s April and here I am, as promised writing something about our recent projects. This post is all about kiddos and our target audience, are two adorable girlies age two and four.
We love all the kids projects but our heart is particularly driven to G I R L I E S. Tati has a lovely teenager, so mama’s opinion is a big NO! and I have two Cocos (boys) - so from all angles this is our little baby.
So, what is the story here? Well, we will brief you only part of the story in this post, and progressively, we will reveal the rest of this lovely six bedroom villa located in Jumeirah.
Let’s make a start! Our lovely clients from the Netherlands and Colombia, recently moved homes to a lovely villa in Jumeirah, most precisely, Al Manara area. When I say lovely, I mean, A M A Z I NG (with capital letters). This spot is absolutely stunning. The space and distribution of the villa is perfection. Most importantly the open look and feel is absolutely out of this world.
Taken all the above in consideration, we have called this project Bali in Dubai! Well, the entrance is breath taking and the whole look and feel gives such a Bali vibe. Our clients, had previously lived in different parts of the world and had possession of some unique pieces and hidden gems which were of great help to complete this project. On this lines, this time, we were hired to mix and match existing furniture and accessories with minimal spending. Instead, we were instructed to invest the majority of our time CREATING the unexpected with the existing. The project involved the creation, styling and decoration of four rooms, including, the entrance hall, play room, dining and living room.

Swing chairs from Marina Home
We will kick off with the KIDS PLAY AREA! Just because, we are absolutely IN- LOVE with the process and result.
So, guess what? Our client wanted ZERO pink! She has two lovely girls and they are particularly emphasized in the NO PINK situation. By no surprise, she is not the only client that has requested this from us. As a result, we focused our energy on creating a neutral gender look and feel but yet incorporating girlie touches.
If you follow us, you will know by now, that our starting point of the design phase is creating the right color palette and inspirational mood board. While the process sounds quite straight forward, we took on different factors, including inspiration, vibe, color palettes and furniture.
This time, our color palette was literally taken from an ice-cream outing. Over the christmas holidays, Mathe, one of my boys ordered bubble gum (minty cream), Gaby, my youngest, ordered mango (mustard) and I ordered lemon sorbet - treat. (snow white). We were in the designing stage of the project, so I quickly ran all the ideas with the team and developed a more consolidated color palette. Once we created the color scheme, we then, emphasized on the non-pink girlie touches.

Now that you know the story, we will guide you to the four different stations we created for this play area and show you the different angles we incorporated through this space.
We hope you like it!
1. W A L L - C O L O R P A L E T T E
We decided to paint the biggest wall of the room and made it our statement wall. The chosen paint was MINTY BREEZE from Jotun and it was just the right shade. While we didn’t paint the whole wall and instead we decided to incorporate a wood divider and painted only half. This is such an inexpensive touch that added character to the wall. You can find this at ACE from AED 60. This comes in natural wood finish, therefore we repainted this with plain white, added some glue and VOILA!

Cactus from Tribe.

Cushions from H&M home.

2. T H R E E C O L O U R S O F A
At the designing stage, we wanted to custom made a wood play house. The idea was cool and it would have given a different vibe to the room. Little did we know that this sofa was also for ADULTS. In this regard, our original idea was thrown to the bin and instead, we designed and custom made this beautiful two seater sofa. We wanted to blend mustard, mint and natural wood. The result was a winner.

Costumed made piece, design by C'est ici


3. D R E A M Y B O O K S H E L V E S
One of the main problems, we often find in some of the casitas are book clutter (including ours). More specifically, kids' books. Yes yes, we all want to build this reading habit, which is wonderful but we are all overloaded with them. So, we basically declutter a few of them and made a categories from the most popular ones to the least. The popular ones were placed in the lower shelves with an easy access and the oldies were up up up.
We also wanted to create a statement wall within the shelving area. This time we selected this beauty horizontal stripe wall paper from PAPER POP DUBAI, which is absolutely stunning and gave the kick we were looking for.
Final accessories were purchased emphasizing in accent colors but also in accessories out of the color palette. We wanted to avoid the matchy matchy common mistake. We incorporated polka dots and brighter shades including our signature botanicals.


4. D R A W I N G A C A S I T A
Well, let me tell you that this is the easiest most non-expensive way to build your own casita in the wall. Our final touch and most waited creation was the master piece ‘la Casita'. So, what did we do?
First, we bought black scotch tape and did a sketch of the size and form of the house. We then painted the casita in grey and VOILA. A casita without an activity is boring, so we bought a drawing set from IKEA, this way both girls would have a nice and chic space to DRAW.


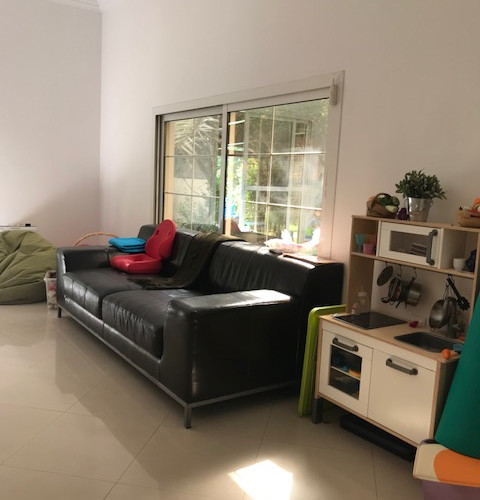
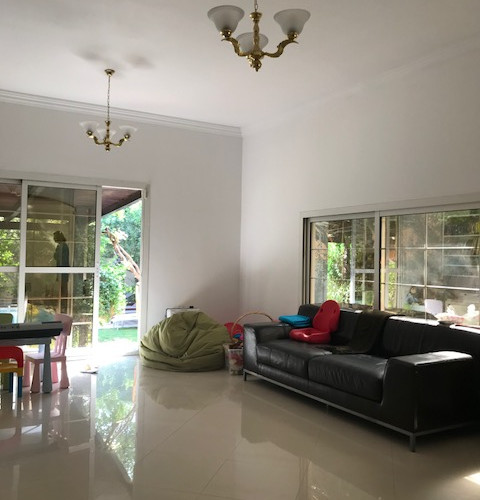
Before saying ADIOS, have a glimpse at the BEFORE pictures so you can have a better visualization of the makeover of this casita.
Well, that’s all amigos! Hope you like the process and making of this beautiful play room! We thank our lovely clients for the trust and freedom to this creation!
Keep tuned to Part II of the makeover of this casita ‘’the ENTRANCE’’ quite a catch!
Besos
Moni and Tati
xoxo


Comments